Showing posts with label Floral. Show all posts

Tuesday, 24 February 2026

A Passion for Markers Blog Spot Challenge #826 - Spring Flowers - Sponsored by Uniko Stamps

Hello everyone wishing you all a lovely day - it feels like ages since I've updated my blog, this last few weeks have been awful with my labyrinthitis so no crafting, no reading and definitely no work on the computer.  Things are improving and my new hearing aid is helping with the tinnitus but I'm still struggling to look down for very long.... fingers crossed it stops soon

Anyway - Spring is in the air and the sun is shining so that's definitely a positive - it just makes everyone feel so much better after all the horrid winds and heavy rainfall we've had.

Today I'm here to let you know that there's a new week long challenge on the Passion for Markers Blog challenge and I hope that you will join in as there is a prize up for grabs.


This week we are being sponsored by Uniko Stamps and our theme is very simple - Spring Flowers and is being hosted by Me for Team 2.


As Spring flowers are popping up around the garden I decided today to use stamps from Lili Of The Valley LOTV  I used the Flower Alphabet set for the word Spring and then for the smaller Wishes the Everyday Greetings set, colouring these with my Promarkers before cutting out on my ScanNCut.


I created a split DL card, using pretty Spring floral paper for the design and adhering the large letters across the gap in the panel.

The finishing touches were some sparkly flower sequins and glossy accents to some of the little flowers.

Wishing you all a wonderful week!

I hope that you join in with the challenge as don't forget there is a prize from the sponsor for our lucky winner!


I really hope that you have enjoyed my card today and will drop by again to see my next project and don't forget to join in with the challenge over on the Passion for Markers blog


Hasta luego ๐Ÿ‘‹ 


Enjoy the rest of your day !


Card recipe:
LOTV stamps - Flower Alphabet 
LOTV stamps - Everyday Greetings
LOTV & Nitwit Collections Paper pad - Bonnets & Bowties
Distress ink - twisted citron
flower sequins
glossy accents


Thanks for stopping by and reading my blog I would love if you could leave me a comment. 


 Wendy x

Tuesday, 23 September 2025

A Passion for Markers Blog Spot Challenge #807 - Anything floral - Sponsored by SheepSki Designs

Hello everyone wishing you all a lovely day - So after a wonderful holiday in Mallorca I'm back and raring to go !  Ha Ha Ha ....not quite!, I've not quite got my crafty mojo back - its probably sunning itself on holiday still! but hopefully it will return soon as I have lots of new goodies to play with.

So to get things moving there's a new challenge has started over on the Passion for Markers Blog challenge and I hope that you will join in.


This weeks challenge theme of 'Anything floral' has been chosen by Elaine for team 2 and is being sponsored by Sheepski Designs. The online Etsy store is now sadly closed but the lucky winner will be sent a link to download their chosen 3 images.


If you know me then you know I love strong vibrant colours but I decided to create a more delicate looking card for today and chose to use this fabulous Daisy Panel image.

We have some beautiful daisy type flowers in our garden in some striking vibrant colours...I always thought they were called Livingstone Daisies or Mesembryanthemums but I'm not so sure now so I will have to do a bit of research.  There are some white ones too which have a hint of shocking pink at the centre so that's my inspiration for today.


The image was resized to suit the DL card, printing onto alcohol friendly card stock before colouring  with my Promarkers.  I also printed out 5 extra flowers and fussy cut these out, layering up with foam squares for dimension.

To create the background I used a pale teal green promarker around the flowers, blending out to white. Then I chose a couple of distress inks and blended these into the design.   I splattered some distress ink around the flowers and the finishing touches were some clear drops around the flowers.

The sentiment was printed directly onto the panel.

I hope that you join in with the challenge as there is a prize from the sponsor for our lucky winner!


I really hope that you have enjoyed my card today and will drop by again to see my next project and don't forget to join in with the challenge over on the Passion for Markers blog


Hasta luego ๐Ÿ‘‹ 


Enjoy the rest of your day !


Card recipePlease note contains some Affiliate links at no cost to you if you purchasing using these.

SheepSki Designs Digital stamp -
 Daisy Panel
LOTV digital sentiment - Fairy Sentiments
Distress inks - weathered wood, speckled egg, picked raspberry
Button Galore gems - Island Breeze
Posca Pen - white


Thanks for stopping by and reading my blog I would love if you could leave me a comment. 


 Wendy x

Friday, 29 August 2025

Hugs - Sleepy Bug - The Ladybug Collection - Bumble Buzz collection - with Julia McNeil Designs

Hello everyone Happy Friday everyone !  I hope you are enjoying the last few weeks of the Summer - it's a little bit cooler here  today - only 34C (LOL) but the heat still hasn't dropped off completely yet.

Today I have a whimsical floral card made using a combination of digital papers and one of the cute stamp sets.

I love when I can mix and match physical and digital products and they work so well together.


I started off by stamping Sleepy Bug in grey Versafine ink onto a piece of paper from  the Bumble Buzz collection and then layered this onto my card blank on a piece of grey satin card.

Next I chose one of the papers from the Chocolate & Marshmallow paper pad and stamps the flowers onto this with the grey ink.  I then fussy cut out the flowers to add to the bottom of the card using foam tape for dimension.

I used some coloured pencils to colour the flower stem, ladybug and the flower centres adding some subtle shading with darker shades.

I then used 3D glue gel to add the flowers to the card, curling up the edges of the petals for dimension.  

I used a word die to cut out hugs twice, layering these together before adding to my design.

Finishing touches were some pale pink gems.

I do hope that you like my card for today and I'd love it if you'd leave me a comment. 


Hasta luego ๐Ÿ‘‹ 


Enjoy the rest of your day !


Card recipe: Please note contains some Affiliate links at no cost to you if you purchasing using these.
Buttons Galore & More gems - All is calm


Thanks for stopping by and reading my blog I would love if you could leave me a comment. 

Wendy x

Tuesday, 19 August 2025

Just a little Hello - Sending Happy thoughts with Altenew

Hello everyone happy Tuesday!  

I hope you are having a lovely week - I treated myself some time ago to a Build a Garden collection by Altenew.

The set is called the Daisy Crown collection and I bought the stamp set, layering stencils and coordinating dies, but I've been so busy with other projects I've never got round to playing with it.

So I decided to have a play whilst hiding indoors to try to keep cool.

It's very different from my normal cute cards but I do love to make floral cards.

I used the smaller of the floral images for this card and I've got loads more ideas just need to have the time - who knew being retired would be so busy... LOL


I stamped the smaller floral spray in a light grey distress ink and then used the layering stencils to colour the design before cutting out with the matching die.

The background is a piece of fabulous ink drop paper that I have been hoarding but thought it was about time I used some !...the design has the look of gold foiling but I decided to add more, splattering the panel with foiling flake glue before adding gold foil.

The sentiment were stamped using purple Versafine Clair ink, one directly onto the card blank and the other die cut and then mounted with foam. Finishing touches were a few pieces of gold confetti around the design.


I hope that you like my project today and you'll come back to see my next project 


Hasta luego ๐Ÿ‘‹ 


Enjoy the rest of your day !


Project recipe:

Altenew - Build a Garden - Daisy Crown - stencil & dies
Distress Inks - black soot, mustard seed, wild honey, worn lipstick, aged mahogany, twisted citron, mowed lawn. hickory smoke
Craft Consortium Papers - Ink Drops - Vivid
Crafters Companion - gold foil
Pebeo gilding paste
Versafine Clair - monarch
Spellbinders confetti -  gold


Thanks for stopping by and reading my blog I would love if you could leave me a comment. 

Wendy x

Wednesday, 5 March 2025

Digi Choosday - Flowers - Orange - Darling Buds with Polkadoodles

Hello everyone and happy Wednesday... I hope that you are having a good week....


It's that time of the week to share some more inspiration for our current 'Anything Goes' challenge over on the Polkadoodles Digi Choosday Blog so I hope you are going to join in and don't forget the amazing Digi Choosday discount off all crafty printable downloads!  

Our challenges our now 4 weekly so there's loads of time for you to join in and more chances to win too!


The theme set for the DT this week is to create a project/card using flowers and the colour orange......not a colour I naturally turn to but I do love how vibrant it is...perfect to get us in the mood for warmer weather.

I decided to create a larger A7 5" x 7" card today.  I chose one of the wonderful papers from the Freddy Fox collection and in my graphics software I colourized this turning the flowers orange before printing out.  I also chose a sentiment from the Darling Buds collection and added this to some teal paper and printed this also along with the pre-coloured Marigold - I love how vibrant she is.

I die cut a circle, offset from the floral paper and layered this over the teal paper adding an orange frame to the circle.  Next I used my Polychromos pencils adding lots of orange to the image to make it more vibrant and then fussy cut her out before adding over the card with foam tape for dimension.

To finish off my project I added some super sparkly glitter to some of the flowers and some orange gems around the design.

 
I hope that you like my card today and you'll enjoy the next cards I share from Polkadoodles.


Hasta luego ๐Ÿ‘‹ 


Enjoy the rest of your day !


Card recipe: Please note contains some Affiliate links at no cost to you if you purchasing using these.

Polkadoodles pre-coloured digital image  - Darling Buds - Marigold
Polkadoodles digital sentiment - Darling Buds - sentiment bundle
Polkadoodles digital paper - Freddy Fox collection 
Kaiser craft gems - orange
Stickles - platinum


Thanks for stopping by and reading my blog I would love if you could leave me a comment. 

Wendy x

Wednesday, 19 February 2025

Digi Choosday - Mother's Day - Not a card - with Polkadoodles

Hello everyone and happy Wednesday... I hope that you are having a good week....


It's that time of the week to share some inspiration for our current 'Anything Goes' challenge over on the Polkadoodles Digi Choosday Blog so I hope you are going to join in and don't forget the amazing Digi Choosday discount off all crafty printable downloads!  

Our challenges our now 4 weekly so there's loads of time for you to join in and more chances to win too!


The theme set for the DT this week is to create a Mother's Day project but not a card.

I decided to create a little embroidery hoop picture - its's definitely something that my mum would have loved to hang up on a wall. 

I decided to use the beautiful pre-coloured image from the Pretty Flower Wreath Digi Deal for my project today, resizing this to suit the size of the embroidery hoop and adding this onto a layer of floral paper from the kit before printing out.

I then printed this out onto thin card and also onto vellum, using a torn edge die to cut out the main image.

Next I stretched a peice of cream fabric into the embroidery frame, trimming of the excess and then using Mod Podge to seal the edges at the back of the hoop.

I covered the front of the fabric with a layer of white gesso and allowed this to completely dry before adhering the die cut out image onto the hoop and covering with Mod Podge to seal the design.

I then fussy cut out some of the flowers and extra butterflies that i had printed onto vellum and used a clear 3D silicone glue gel to adhere these onto the image.  

To finish off my project I added some super sparkly crystal gems around the design and threaded purple twine to hang the hoop onto a wall.


I hope that you like my card today and you'll enjoy the next cards I share from Polkadoodles.


Hasta luego ๐Ÿ‘‹ 


Enjoy the rest of your day !


Card recipe: Please note contains some Affiliate links at no cost to you if you purchasing using these.

Polkadoodles digital deal  - Pretty Flower Wreath
embroidery hoop
Pretty Pink Posh crystals - Sugar plum
Mod Podge
Vellum


Thanks for stopping by and reading my blog I would love if you could leave me a comment. 

Wendy x

Wednesday, 18 September 2024

Digi Choosday - Freddy Fox - Friendship and flowers with Polkadoodles

Hello everyone and happy Wednesday I hope that your having a good week so far.

Are you looking forward to Autumn ? I love all the seasons but the Autumn colours are my favourite and I adore the poppies that we get here although they tend to be in Spring.


It's that time of the week when we launch a brand new 'Anything Goes' challenge over on the Polkadoodles Digi Choosday Blog so I hope you are going to join in and don't forget the amazing discount off all crafty printable downloads until midnight today!


The theme set for the DT this week is to create a Friendship themed card so I decided to create a one layer
 card using the fabulous and very cute Freddy Fox release..... I just love all the warm tones of Autumn so this is one of my favourite collections.

It's a very simple A6 card with the design panel mounted onto a layer of red card.  To create the image I started by adding the fox and poppy image to a panel in my graphics software (I've also flipped this through 90 for a different look and then added 3 little bees and the cute little duck to create my scene.  Finally I chose a friendship themed sentiment from the collection before printing on alcohol marker friendly cardstock and colouring with promarkers.

Just a few touches of clear sparkle were added to the little bees and I used yellow glossy drops to add details to the poppy stamens.

I hope that you like my card today and you'll enjoy the next cards I share from the new Freddy the Fox Collection by
 Polkadoodles.


Hasta luego ๐Ÿ‘‹ 


Enjoy the rest of your day !


Card recipe:Please note contains some Affiliate links at no cost to you if you purchasing using these.

Polkadoodles digital stamp - Freddy Fox - Poppy Flowers
Polkadoodles digital Sentiment - Freddy Fox - Sentiment Bundle
Polkadoodles digital Ephemera - Freddy Fox -  Bundle
Sakura Gelly Roll pen - white, black
Tonic Nuvo Crystal Drops - English mustard
Spectrum Noir Sparkle pen - clear


Promarkers Used:

Freddy:         cedar brown, burnt orange, orange, mandarin
                    salmon pink, pale pink 
                    lemon chiffon, pale cream

Scarf :          verdigris, grey green, mint green


Duck:           gold, sunflower, buttercup
                   mandarin, burnt orange

Bees:           gold, sunflower, buttercup
                    blue black, cool grey 7, 5
                    lime zest 


Thanks for stopping by and reading my blog I would love if you could leave me a comment. 

Wendy x

Tuesday, 17 September 2024

A Passion for Markers BlogSpot #757 - Add a flower - Sponsored by Leann's World 101

Hello everyone wishing you all a lovely day !

Today I'm here to let you know that a new challenge has started over on the Passion for Markers Blog challenge and I hope that you will join in.


This weeks challenge theme of 'Add a Flower' has been chosen by Linda for team 2 and being sponsored by LeAnn's World 101


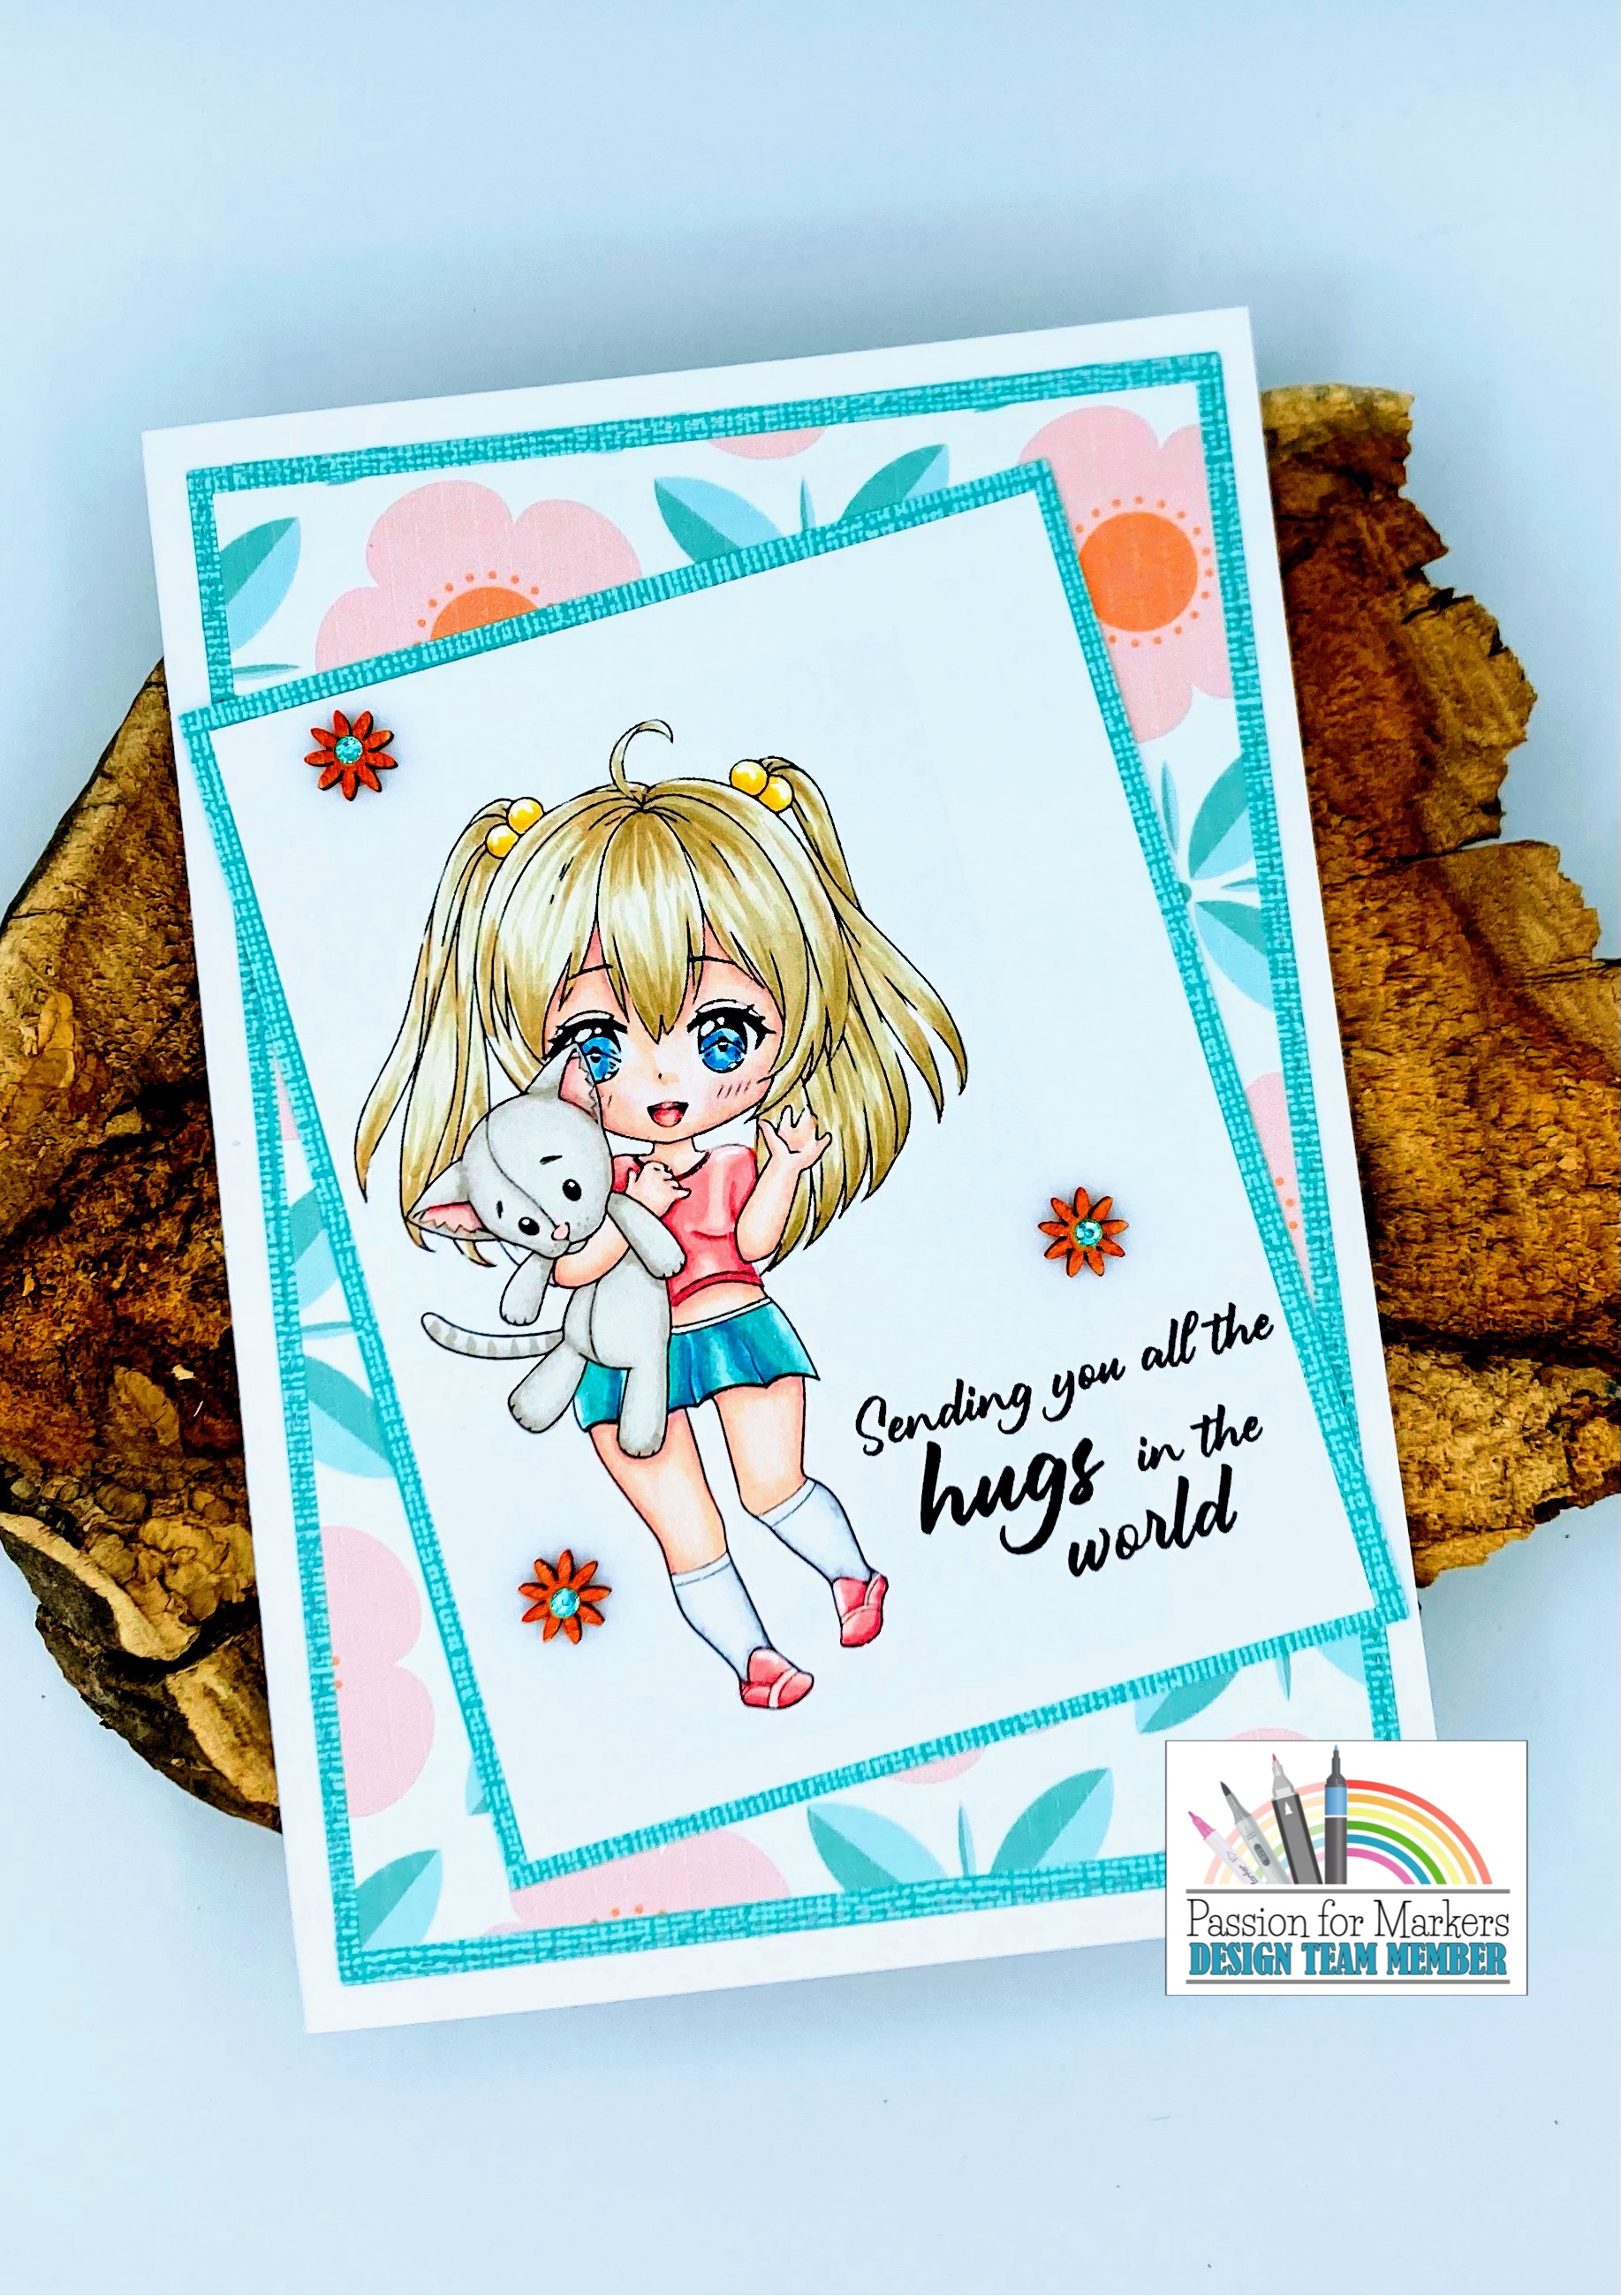
This is a 5 x 7 portrait card with layers of teal card and a pretty teal and peach floral paper. I used the colours on the paper to choose the colours for my colour palette today.


I resized the image and printed it out onto alcohol marker friendly cardstock adding a sweet sentiment to the panel.  Next I coloured the image (see below for colours used) and then assembled the card.

Once the card had been assembled I added 3 small wooden flowers to the design, keeping it nice and simple. 

I hope that you join in with the challenge as there is a prize from the sponsor for our lucky winner!

I really hope that you have enjoyed my card today and will drop by again to see my next project and don't forget to join in with the challenge over on the Passion for Markers blog


Hasta luego ๐Ÿ‘‹ 


Enjoy the rest of your day !


Card recipe:Please note contains some Affiliate links at no cost to you if you purchasing using these.

LeAnn's World Designs Digital stamp - 
Katie and friend 
Polkadoodles digital paper- Winnie Daisy Fairy 2 collection - paper bundle 4
Polkadoodles digital sentiment - Honeypie Just Lovely - sentiment bundle 
Sakura Gelly roll pen - white


Promarkers used :

Skin:            almond, blush, oatmeal, soft peach, dusky rose

Blush:           pale pink

Hair:            caramel, sandstone, pastel beige

Eyes:            Aegean, cool aqua

Kitty:            warm grey 00, 1, 3
                    antique pink, misty rose
  
Bobbles:       gold, sunflower, buttercup

Skirt:            marine, turquoise, soft green

Socks:           ice grey 00, 1, 3

Shoes:           antique pink, salmon pink, misty rose
T-shirt


Thanks for stopping by and reading my blog I would love if you could leave me a comment. 


 Wendy x

Friday, 13 September 2024

Sending Love - Bumble Buzz Digital collection with Julia McNeill Designs

Hello everyone Happy Friday - Yay the best day of the week ! (and I'm retired lol)

I hope that you have all had a great week and have something nice planned for the weekend, hopefully we'll be wandering into town this evening for a few drinks at our favourite bar.

It's nearly the middle of September and Autumn is definitely here...the evenings are cooling off fast and the daytime temperatures are in the low to mid 30's so a lovely respite after the high temperatures of this Summer.

Today I'm sharing a project for JMC Designs  that I've created using the absolutely gorgeous Bumble Buzz Digital Collection.


The gorgeous digital collection contains 
  • 15 Digital Stamps
  • 15 Pre Coloured Digital Stamps
  • 6 Ephemera Sheets
  • 5 Topper Sheets
  • 4 Sentiment Sheets
  • 23 papers.
and I think there's definitely something for everyone, if you love to colour or not.

For my card today I chose one of the gorgeous pre-coloured roses from the ephemera and the pink and brown striped paper.  I love making cute character based cards but sometimes we need a card that's less cutesy and this rose stem is perfect for a more grown up but still whimsical look.

I wanted an Autumn flavoured card so have teamed this with some lovely chocolate brown satin card using one of my dies to cut a scalloped frame for my DL card.

I blended a little pink distress ink onto a white DL panel and then used some pink metallic watercolour to splatter across this panel.  

Next I fussy cut the rose stem from the ephemera in the collection and then added this to the card using some 3D silicone glue gel for dimension.  The sentiment is a simple word die that I have layered chocolate card and white card on top to give a drop shadow.

The finishing touches were some drops of glossy accents on the petals and leaves, to resemble water droplets and a few pieces of rose confetti.

I do hope that you like my card for today and Id love it if you'd leave me a comment. 


Hasta luego ๐Ÿ‘‹ 


Enjoy the rest of your day !


Card recipe:
Distress Ink - picked raspberry
Lisa Horton Crafts - Euphoria Watercolours
Sakura Gelly Roll pen - White Pen
Spellbinders confetti - rose


Thanks for stopping by and reading my blog I would love if you could leave me a comment. 


Wendy x

Tuesday, 6 August 2024

Autumn /Fall card - Freddy Fox - Winter Latte Freddy - Digi Choosday with Polkadoodles

Hello everyone and happy Tuesday. It's still the middle of Summer here and I hope that you Summer weather is treating you ok too....I hate to say it but Autumn won't be that far away now.

I think as crafters sometimes we are chasing the next season but I suppose it takes time for us to make cards....


It's that time of the week when we launch a brand new 'Anything Goes' challenge over on the Polkadoodles Digi Choosday Blog so I hope you are going to join in and don't forget the amazing discount off all crafty printable downloads until midnight today!


The theme set for the DT this week is to create an Autumn of Fall themed card
.

The colours on the mountain sides and in the forests are stunning in the Autumn here so I thought that today I would share a card using the Freddy Fox release.

This is a pop up frame card that I've made using the gorgeous digital stamp Winter Latte


The pop up frame cards are probably my favourite style and this is a 6" x 6" card.  They are really easy to make and there are some fabulous instructions by Jennifer McGuire if you would like to give it a go.


Once you've made one, its really easy to alter the dimensions to suit the card size that you want to create.


There is a great tutorial on YouTube tutorial by Jennifer McGuire, showing how to make these make a popup up frame cards.   If you haven't seen the video here is the link.

I planned on cutting out the centre of the  wreath design and then popping up my focal image in the centre of the card panel, using a small card pop up element. Basically a strip of card that is folded and adhered to the card that pops up but folds flat too.


I decided to create a floral wreath for my frame so started by adding elements from the ephemera bundle to create a wreath shape onto one of the gorgeous papers from the collection in my graphics software, before printing this out, I copied  some of the flower elements so I could fussy cut these out for my design.


I coloured the Freddy Fox image using Promarkers and then fussy cut him out mounting him in the centre of the aperture.


I hope that you like my card today and you'll enjoy the next cards I share from for Polkadoodles.


Hasta luego ๐Ÿ‘‹ 


Enjoy the rest of your day !


Card recipe:

Polkadoodles digital stamp - Freddy Fox - Winter Latte
Polkadoodles digital paper - Freddy Fox - Autumn Fall Papers Set 1 & paper set 2
Polkadoodles digital Sentiment - Freddy Fox - Sentiment Bundle
Polkadoodles digital Ephemera - Freddy Fox -  Ephemera Bundle
Distress Ink - spiced marmalade
Sakura Gelly Roll pen - white, black, metallic grey
Pretty Pink Posh confetti - rose gold


Promarkers Used:

Freddy:                 cedar brown, burnt orange, orange, mandarin
                            salmon pink, pale pink 
                            lemon chiffon, pale cream

Hat:                      ocean teal, green, mint green
                            verdigris, grey green, tea green
                    
Pom Pom:             lemon chiffon, pale cream

Latte:                   dusky rose, antique pink, sunkissed pink
                            deep mocha, coffee, raw sienna

Chocolate sticks:   deep mocha, coffee, raw sienna
                           lemon chiffon, pale cream


Thanks for stopping by and reading my blog I would love if you could leave me a comment. 

Wendy x