Saturday 27 August 2022

You colour my world with Last Minute Manda

Hello Everyone - wishing you a lovely Saturday !

Today I am here on my blog to share another DT card made for Last Minute Manda...this is Bentley from the Rain or Shine Collection available on ETSY

He is such a cutie, floating on his little cloud so I decided to create him a rainbow background.

The card is a smaller a6 size and I used my new rainbow stencil from RitaRita Scrapbooking and my distress inks to create a rainbow of rainbows.

Next I have cut a selection of clouds from white cardstock and stamped the sentiment on the largest cloud at the bottom with my Versafine Clair heat before adding clear embossing powder and heat setting.  I've used the residual blue ink on my blending brush to add just a touch of blue to the cloud edges.

The clouds and Bentley have then been adhered to the card, some with wet glue and some with foam tape to give dimension.

Hasta luego ๐Ÿ‘‹ 


Enjoy the rest of your day !


Card recipe:
Lawn Fawn Custom Dies -  stitched rainbow
LHC Garden greenery die - clouds
Promarkers (see below)
Distress ink - candied apple, carved pumpkin, fossilised amber, twisted citron, mermaid lagoon, wilted violet, picked raspberry
Woodware Craft Collection Sentiment stamp - Rainbow gnome 
Versafine Clair ink - twilight
Cosmic Shimmer detail embossing powder - clear
Sakura gelly roll pen - white
Pretty Pink Posh confetti - Metallic silver
.
.
.
.
.
.
.
Promarkers used :

Bentley

Nose: praline, sandstone, pastel beige pale blossom, blossom

Face/paws: cocoa, cinnamon, tan

Ears: blossom, pale blossom, cocoa, cinnamon tan

Hat: forest green, bright green, leaf green, sunflower, yellow, primrose

Shirt: ruby, berry red, lipstick red, forest green, leaf green

Cloud: Ice grey 1, blender pen


I am entering this card in the following challenges:


Thanks for stopping by and reading my blog I would love if you could leave me a comment. 


Wendy x

Friday 26 August 2022

More Busy Bees with Polkadoodles

Hello everyone.... wishing you all a wonderful Friday ๐Ÿฏ

So we all know how important the bees are and I had some embellies left over from my last Polkadoodles DT project that I didn't want to waste so I couldn't resist making another Buzzy Bee card and I hope that you like it.

To make my background panel for the card I created a homemade stencil, die cutting a honeycomb pattern using a small hexagonal die and then I've used a combination of distress inks to blend over the stencil.  The stitched lines are hand drawn using a fine liner pen.
 ๐Ÿฏ

The bees, flowers and the sentiment are all taken from the Winnie Fruit Punch Bundle which is a wonderful collection of black and white digital stamps, coloured images and loads of embellies - its one of my favourite collections.

I've then layered up the flowers and bees over their honeycomb and added glossy accents to the centre of the flowers.

Its a simple card but I'm so pleased with it !

I hope you liked my card for today and don't forget to join in with the 'Anything goes' challenge over at the DIGI CHOOSDAY BLOG!
 
๐Ÿฏ

๐Ÿงก๐Ÿ’› 
Hasta luego ๐Ÿ‘‹ 


Enjoy the rest of your day !


Card recipe:
Polkadoodles Embellies - Winnie Fruit Punch bundle
Pinkfresh Studio Essentials dies - diagonal stitched rectangles
Hexagonal die
Sakura Gelly Roll pen - black
Stabilo fine liner - orange
Distress Inks - Squeezed Lemonade, spiced marmalade
Orange Candi
Glossy accents
black gems
Spectrum noir Sparkle pen -  clear 

๐Ÿงก๐Ÿ’› 


I am entering this card in the following challenges:


intaas ()


Dragonfly Dreams  ()


Paper Craft Crew ()


Thanks for stopping by and reading my blog I would love if you could leave me a comment. 


Wendy x

Tuesday 23 August 2022

Winnie Buzzy Bee with Polkadoodles

Hello everyone...its Tuesday so I'm back today with another Polkadoodles Design Team project for the Digi Choosday Tuesday Challenge๐Ÿงก๐Ÿ’›


Every Tuesday is DIGI CHOOSDAY! over at Polkadoodles which means not only a brand new crafty 'Anything goes' challenge but also that you get an amazing discount off all crafty printable downloads until midnight today!


To take advantage of the offer head over to the blog to find the discount offer for today and also to enter the challenge!

DON'T MISS IT!

๐Ÿงก๐Ÿ’› 

This week the DT was asked to make a card using the colours Orange and Yellow 
๐Ÿงก๐Ÿ’› 

When I think of Orange and Yellow I immediately think of bees and honey so I decided to use the Winnie Buzzy Bee digital stamp and bee themed embellies from the Winnie Fruit Punch Collection. 

๐Ÿงก๐Ÿ’› 

I started off by creating an inky background for my card using  several yellow and orange distress inks, simply swiping the ink pad onto a glass mat spraying with a little water and then mopping up the ink using a piece of watercolour card stock.  

To create interest each colour is added separately and dried with my heat tool between each application. I also used a fan brush to splatter the panel with some of the ink and a little orange sparkle from  a Spectrum noir sparkle pen.

Once I was happy with the overall effect I put this to one side to allow it to dry - it doesn't matter at this point if the background panel is a little warped as I will be running it through my die cutting.


When the panel was completely dry I used a couple of hexagonal dies to cut apertures into the panel to resemble the honeycomb in a beehive.


Next I used some low tack tape and temporarily fastened the panel to my 5" x 7" card blank - this will act as a template.

Each of the die cut hexagons were then repositioned into the panel using a littel wet glue to adhere these to the card blank.  When the die cuts where dry I then carefully removed the larger peice leaving the die cuts adhered to the card blank.

I then used a small amount of orange ink to blend around the hexagons - this will stop the white card showing once the top panel is placed onto the card.

I wanted to create a honeycomb effect shaker panel so my next step was to create the shaker wells.


A piece of acetate was first adhered to the back of the top panel using some strong red liner tape and the I used small strips of foam tape to create wells around the hexagonal openings.

You could easily just create a single well, but I wanted the sequins to be kept separate in the different honeycomb section. 

Next I added a selection of orange and yellow sequins to my shaker panel before adhering a second acetate panel across the top to encase the shaker bits. 

Top Tip ๐Ÿ’ก: make sure there are no gaps so the shaker bits don't fall out once the card is assembled.

Once this was completed I then fastened this complete shake panel to the card blank - carefully lining up the apertures with the hexagonal die cuts on the card base.

This is my completed shaker panel ready for the decoration.


๐Ÿงก๐Ÿ’› 
I first resized the digital stamp of Winnie Buzzy Bee using my graphics  software  to suit my card before printing her out and colouring her using my Promarkers.

I also selected several bee themed embellies and word art from the collection, again resizing these to suite my design before hand fussy cutting these out and adhering to my card.


I hope you liked my card for today and don't forget to join in with the 'Anything goes' challenge over at the DIGI CHOOSDAY BLOG!

๐Ÿงก๐Ÿ’› 
Hasta luego ๐Ÿ‘‹ 

Enjoy the rest of your day !


Card recipe:
Polkadoodles digital stamp - Winnie Buzzy Bee 
Polkadoodles Embellies - Winnie Fruit Punch bundle
Hexagonal dies
Promarkers - see below
Distress Inks - Squeezed Lemonade, Fossilized amber, spiced marmalade, dried marigold

confetti & sequins
Spectrum noir Sparkle pens - Tangerine, black , clear 
.
.
.
.
๐Ÿงก๐Ÿ’› 
Promarkers used:

Skin: Ivory, Almond, Satin, Dusky Pink, Sunkissed Pink

Blush & lips: Pale Pink, Antique pink

Hair: Pastel yellow, buttercup, sandstone, caramel

Outfit: Caramel, praline, sandstone,pastel beige, mustard, buttercup, primrose

Boots: caramel, praline, sandstone, caramel, cool grey 5,3,2,1

Smoker and funnel: Cool grey 4,3,2,1

Bee hives: Henna, Caramel, Sandstone, Pastel beige, Shale, Warm grey 4,2,1

Grass: Forest green, bright green, lime zest

Flowers: Mandarin, amber


๐Ÿงก๐Ÿ’› 

I am entering this card in the following challenges:


intaas (15) Top 3


LeAnn's World 101 Challenge (57) DT Favourite


Paper Craft Crew ()


Thanks for stopping by and reading my blog I would love if you could leave me a comment. 

Wendy x

Saturday 20 August 2022

Island Dreams with Last Minute Manda


Happy Saturday everyone…..I hope that you are having a lovely weekend. 

Well the temperature is starting to ramp up again here and its predicted to get up to around 35C again today so a lazy day is planned and then we might wander down to one of the local bars later on today as there is a chilli festival being held there.  

The last time we went was in 2018! and I have a funny photo somewhere of my hubby JJ, after he's eaten a whole chilli - he thought it was a mild one but the watering eyes and hiccups that followed proved him very wrong ๐Ÿ˜‚.... even the bar owner thought it was funny !!

I'm back on my blog today to share another DT card for Last Minute Manda.

This card just about sums up my perfect beach, palm trees, cocktails and not a soul around with the sound of the waves gently crashing on the shore. Perfect!

To create this card I've used digital stamps from the Backyard Beach Party collection, coloured with my promarkers (see below).


To create my background, I masked off the horizon line on the card panel and then used my tumbled glass distress ink to create my cloudy sky with a Lawn Fawn stencil. The sea has been simply blended with Salty Ocean distress oxide.  The sentiment is an old stamp from a craft magazine, stamped in Versafine Clair ink with a little sparkle added to the open sections of the letters.

For the sandy beach I used my Lisa Horton Crafts Edgecutz dies and some sandy coloured cardstock. I added little dots of colour in the sand using my Spectrum Aqua pens to add some shading detail. 

I hope that you like my card today ๐ŸŒž


Card recipe:
Last Minute Manda digital stamps - Backyard Beach Party 
LHC Edgecutz die - essential edges
Promarkers (see below)
Distress oxide ink - Scattered Straw, Gathered Twigs, Salty Ocean
Distress ink - tumbled glass
Lawn Fawn Stencil - Cloudy
Sentiment stamp from a craft magazine from 2015
Versafine Clair ink - pinecone
Spectrum Aqua pens - Gold, Chestnut
Stabilo Fine liner pen - brown
Sakura gelly roll pen - white
Spectrum Noir Sparkle pen - clear
.
.
.
.
.
.
.
Promarkers used :

Palm tree: Umber, burnt sienna, praline, sandstone, forest green, bright green, meadow green, henna, cocoa, caramel


Cocktail: Henna, cocoa, caramel, ivory, sandstone, china blue,salmon pink, pale pink, forest green, bright green, pumpkin

Sunglasses: marine, turquoise, cool aqua, cool grey 1, 2

Sun cream: Orange, gold, buttercup, indigo blue, royal blue, china blue


Thanks for stopping by and reading my blog I would love if you could leave me a comment.


 Wendy x

Friday 19 August 2022

Cactus Family with Polkadoodles

Hello everyone I hope that you are having a lovely day today ! 

It was lovely and fresh here this morning so I manged to get out into the garden and dead head my roses - its been on the cards for weeks but its been too hot by the time I've come round in the morning ๐Ÿ˜Š

I wasn't going to share another card so quickly this week but I watched a Facebook live with Lisa from Nifty Noodles Crafting the other day and thought that this  card shape would be perfect for a sweet little cactus image that I had already coloured in and was waiting to be turned into a card.

As many of you know I usually don't make many fancy fold cards - they can be fiddly and time consuming to construct and not great when opened by the recipient who then doesn't know how to display or even open the card.

But this one is called a Faux Stepper card and couldn't be easier and doesn't require any construction. I've seen a couple of videos on this simple card fold already by Paul Ford and also Sam Calcott but was persuaded by Lisa on Tuesday to give it a go and I'm so pleased that I did.


The very cute Cactus family digital stamp is from the recent Happy Cactus collection by Polkadoodles, coloured in with my Promarkers and I've also used papers and sentiments from the collection to create this card.

The cactus family comes as a black & white digital stamp or you can choose a beautiful pre-coloured version so perfect for anyone that doesn't want to colour in.


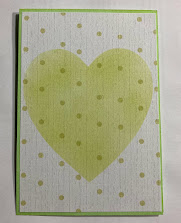
I chose 3 papers from the Happy Cactus collection and some co-ordinating green card stock to make the card base and started by stenciling a heart on my front panel for my cactus family. I also added the same ink around the green card stock and the edges of the patterned paper too.  

To create this card to fit a standard 5" x 7" envelope you need 2 pieces of card stock:
7" x 9 1/2" scored at 3 1/4", 6 1/2" and 8"
3 1/2" x 10" scored at 5" 


The card measurements and instructions for this simple card can all be found over on the YouTube for Paul Ford 
if you fancy making one yourself.

This is my card base fold and scored and as you can see I've added the patterned papers too with more of the same green ink to tie the card together.

I actually thought my green card was a bit pale and wanted a more vibrant green so the Twisted Citron ink really added the extra punch I wanted.  

Once I was happy with the colours I assemble the front panel using some strong red liner tap.


Next I created a panel for the back of my card, using the same spotty paper form the collection but as you can see I die cut an aperture in the panel so my sentiment will show on the back.

I also printed out a large banner sentiment for the from of the card and mounted this on the same green card stock.


This is the back of the card - so room to write your own message too.


I hope that you like my card today.


Card recipe:
Polkadoodles papers, sentiment and digital stamp - Happy Cactus Collection 
Promarkers (see below)
Distress ink - twisted citron, Picked raspberry
LHC Slimline Dies Collection - Nested Torn Edge Slims
Sakura gelly roll pen - white
Sequins from Sugar and Spice crafts - Mojito
.
.
.
.
.
.
.
Promarkers used :

Baby cactus: forest green, bright green, meadow green

Mummy cactus: Moss green, pear green, lime green, orange, amber

Daddy cactus: holly green, lush green, emerald

Plant pot: antique pink, salmon pink, cocktail pink, pastel pink


Thanks for stopping by and reading my blog I would love if you could leave me a comment. 


 Wendy x

Wednesday 17 August 2022

Pippa from Di's Digis

Hello everyone I hope that you are having a lovely day today ! its a little bit cooler here today and last night was good too so a good nights sleep was had.  I have to admit that I'm terrible if I don't get a proper sleep - extremely grouchy and not nice to be with ! 

Anyway, moving on ๐Ÿ˜‚... I wanted to share a card that I've just finished and I hope you like it.

A few months ago I won a free digital Stamp from Di's Digi Stamps for giving a name to one of her new digital stamps - so here is Pippa, shes available to purchase from Di's shop. Diane also has a challenge running currently on her blog page to make a card using Dies and/or punches so this is what I came up with.


I decided to create a Slimline or DL card for a change for this one using my Lisa Horton Crafts Nested Torn Edge Slimline dies.

I started off by using the straight edged rectangular die to cut a panel and then cut apertures in this using the smaller circle dies to create 3 windows in the panel.  I wanted the windows to be offset in the panel.  

Next I ran this window panel through my die cutting machine with an embossing folder to create a vine leaf pattern.  I've used my distress oxide inks over this panel to highlight the embossed detail. 

I used the larger torn edge die to cut my background panel and blended ink in circles roughly behind where the windows would be.  

I also splattered a little of the oxide ink over the entire bottom panel for extra little details.
The embossed panel was adhered on top using foam tape to give some added dimension before decorating the card.


The gorgeous image of Pippa has flowers and leaves at the bottom of the design so I wanted to continue this leafy swirl up the card.  I used a leafy flourish die and some small flower dies to create the swirl of flowers and then adhered Pippa to the card. Pippa was coloured in using Promarkers (details are below of colours used)

The leaves were coloured with Twisted citron ink and the little flowers were die cut from a left over inky background that I had created for another project.

I hope that you like my sunny card for today.


Card recipe:
Di's digital stamp - Pippa
Promarkers (see below)
LHC Slimline Dies Collection - Nested Torn Edge Slims
Craft Concepts Embossing folder - Budding vine
Flourish and flower dies from Crafters Companion
Distress oxide ink - Scattered Straw, Spiced Marmalade
Distress ink - twisted citron
Tonic Nuvo Crystal drops - ebony black
.
.
.
.
.
.
.
Promarkers used :

Skin: almond, blush, oatmeal, soft peach dusky rose

Blush: pale pink

Eyes: marine, turquoise, pastel blue 

Lips: carmine, rose pink, pale pink

Hair:caramel, sandstone, buttercup, pastel yellow

Top: lilac, lavender, amethyst

Flowers: orange, pumpkin, mustard

Leaves: forest green, bright green


I am entering this card in the following challenges:


intaas (4)


Thanks for stopping by and reading my blog I would love if you could leave me a comment. 


Wendy x