Sunday, 31 July 2022

Christmas in July - Part 2

Hello everyone……wishing you a wonderful Sunday...I do hope that you have all had a lovely weekend so far.

So the last day of July is here and I thought I would share another cute little card to say 'adios' to Christmas in July....I'm hoping that this will inspire some of you to get ahead with your Christmas cards this year..... its definitely made me want to make a few more even with the hot weather.

For this smaller A2(US) sized card I've again used one of the cute pre-coloured images called Bella Bear delivering Gifts from the Christmas Holiday Too Cute collection.  
๐Ÿ’–
When I was making my previous project I actually printed out a sheet with 8 of these cuties on so there will be more Christmas cards to follow using Bella in different ways!

I've kept this card really quick and simple - I love making detailed cards but sometimes and especially at Christmas simple and quick is far easier.
๐Ÿ’–
For the background panel I have splattered distress ink, white acrylic paint and silver sparkle over the panel for interest - I wanted it to look a bit like a snowy sky behind my design. 

I had a small piece of paper left from the  Winnie White Christmas Paper 3 collection, which I've cut to size and then hand torn down the right hand side before adhering this to the panel.
๐Ÿ’–
Next I used edge dies to cut a couple of hills from silver glitter cardstock that will be adhered at the bottom of the panel - the hill positioned at the back has had a little white acrylic paint brushed over it to give a bit of depth. 

My Bella bear has then been adhered using a wet glue but I've tucked her feet below the front hill  so it looks like she is standing in a snow drift.
๐Ÿ’–
To finish off this very simple and easy card I've added a Seasons Greeting sentiment that you can download from the  Polkadoodles website.

And finally I've added glossy accents to her nose, scattered a few tiny silver stars over the panel, added black Nuvo crystal drops as buttons on her duffle coat and used a clear sparkle pen to add a little touch of bling to the present and card.
 
I hope you liked my card for today and that will join us with the Week 30 challenge over on the DIGI CHOOSDAY BLOG!


Hasta luego ๐Ÿ‘‹ !


Enjoy the rest of your day !


๐Ÿ’–

Card recipe:
Polkadoodles digital stamp - Bella Bear delivering Christmas gifts
Polkadoodles Winnie White Christmas Paper 
Polkadoodles Sentiment - Seasons Greetings freebie
LHC Edgecutz dies - Essential Edges
Tonic Nuvo Crystal drops - Ebony black
Distress Ink - Tumbled Glass
Acrylic paint - white
Hunkydory Diamond Sparkles - Soft Snowdrift
Spectrum Noir sparkle pen - clear
Silver star sequins

๐Ÿ’–

Thanks for stopping by and reading my blog I would love if you could leave me a comment. 

Wendy x

Thursday, 28 July 2022

Thinking of You with Polkadoodles

Hello everyone I hope that you are all having a lovely day.  

After a slightly cooler and overcast day here yesterday the temperature is up again set to be around 35C at the hottest part of the day around 17:00 today....so it'll be another hot night ahead too.

I managed to get a few small plants, that I've grown from cuttings in the ground this morning but its too hot now to work outside so I've just come inside to cool down before I head off to the pool for some relaxing reading and maybe a little colouring later on.


I wanted to share a beautiful 5" x 7" card that I've made using my gorgeous new stamps from Polkadoodles.  I bought the collection of stamps a few weeks ago and then my cousin brought them over for me last week in her suitcase (but shh....don't tell anyone !)


Its a beautiful collection of 
Photopolymer stamps called Blooming Blossoms and I couldn't wait to start playing with them so here is my first card of I think many.


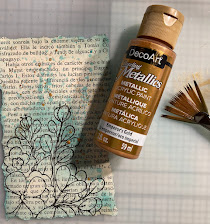
I started this card off by stamping the main design twice onto some old book page - don't worry it was an old much loved book that I found in a charity shop here in our village. 

One image will be for my background and then the second will be coloured for my floral focal point. 

For the background piece I have torn around the edge of the text to create the panel for my card - it roughly measures 3 1/2" x 5 1/2"

Next I blended a small amount of Distress ink over the background piece around the edges and around the stamped image and then splattered Gold and Cream acrylic paint over the background for added details.  

I like to use a fan brush to splatter ink and paint as it gives a lovely effect .

Once dry this background has been layered onto a die cute panel of teal cardstock.

I used a selection of Spectrum Noir sparkle pens to colour the main stamped image and then carefully cut this out by hand.  I like to use old book pages in my designs as they add a lovely texture to the card and are great to work with even when using watercolours.


Once completely dry the card could be assembled - I chose to use a low profile foam pad with this piece just to create a little depth and added shadow. 


Some of the smaller stems were very delicate to cut out but I find it very relaxing and worth the effort.


The sentiment from the set was stamped onto the plain  edge of the page and then I've torn around the words to give a rustic feel to my card.


And finally I added small off cut circles of the matching jade card stock around the design and added glossy accents to create small glossy domes.


Hasta luego ๐Ÿ‘‹ !


Enjoy the rest of your day !


๐Ÿ’–

Card recipe:
Polkadoodles stamps - Thinking of You Blossoms
LHC Mini Slimline Collection dies - Swirling Daisy
Spectrum Noir Sparkle Pens - Firefly, Barn Red, Peach Tree, Pink Champagne, Pistachio, Soft Jade, Garden Green, Lichen, Clear
Distress Ink - Peacock Feathers
Acrylic Paint - Gold Metallic, Cream
Glossy Accents


๐Ÿ’–

I am entering this card in the following challenges:


Thanks for stopping by and reading my blog I would love if you could leave me a comment.

Wendy x

Tuesday, 26 July 2022

Christmas in July

Hello everyone……wishing you all a lovely Tuesday with lots of sunshine..... although as its Christmas in July....maybe not too much sunshine ๐Ÿ˜†๐Ÿ˜†


I'm back today with another Polkadoodles Design Team project for the Digi Choosday Tuesday Challenge 

๐Ÿ’–

Every Tuesday is DIGI CHOOSDAY! over at Polkadoodles which means not only a brand new crafty 'Anything goes' challenge but also that you get an amazing discount off all crafty printable downloads until midnight today! 


To take advantage of the offer head over to the blog to find the discount offer for today and also to enter the challenge!

DON'T MISS IT!

๐Ÿ’–

This week the DT was asked to design a card with a Christmas theme - I have to say that making a Christmas card in temperatures of around 36C wasn't straight forward - especially having my fan on to keep me cool in my craft room - not great for using glitter ๐Ÿ˜†๐Ÿ˜†๐Ÿ˜†


Every year I say I will start my Christmas cards early but every year I put it off so this year starting in July has to be a bonus.

If you are like me I usually have loads of Christmas cards to make so I like them to be quick to make but look wonderful so for todays DT project I decided to use one of the cute pre-coloured images called 

The pre-coloured images are so easy to use, simply print out and fussy cut by hand or you can use the SVG cut file that is included with the downloadable image with your electronic cutting machine....they are also great for anyone that doesn't like colouring too.

For my project today I created a very simple easel card from a 6" x 6" card base - I have simply scored on one of the panels at 3" and then folded to create my card base.

๐Ÿ’–
I started by covering my card base in a couple of different papers from the  Winnie White Christmas Paper 3 collection, mat and layered with thin red cardstock (to keep the weight of the card down), leaving a narrow border.

I wanted my cute little bear carrying his present and card to be set in a little scene so decided to die cut 3 triangles using the same red cardstock.   I have die cut slightly smaller triangles using more of the patterned paper from the collection and inlaid these onto the triangles.  

The Seasons Greeting sentiment is a wonderful freebie that you can download from the  Polkadoodles website.   I added this to one of the papers on my computer in my graphics software before printing it out for my smallest triangle.

The largest triangle was adhered to the bottom half of my easel card, applying wet glue only to the bottom half and the 2 smaller triangles were adhered to the base of the easel using small card pop-up mechanisms so the card will fold flat for posting but the trees will pop-up when opened for display.

๐Ÿ’–
For my cute bear I have resized him on my computer before printing out a couple of times to allow me to decoupage his hat and coat for extra dimension.  I added sparkle to his hat and scarf using luxury interference glitter dust from Lisa Horton Crafts.

I created a similar pop up mechanism to sit behind my bear and adhered him to the card base in the same way.

To add some decoration to my Christmas trees I dug out some chain style gold peel off stickers from my stash and decided to colour them with a red alcohol pen to coordinate with the red cardstock.  


I added some snow to the base of the trees and around my little bears feet using wet glue and  Hunkydory Diamond Sparkle Soft Snowdrift.

You can imagine the mess I was in with all this glitter and my fan - snow and glitter everywhere ! ๐Ÿ˜…

Finally I added some sparkly red and silver clear gems to the larger tree so that when the card is folded flat it still looks decorated.


๐Ÿ’–

I hope you liked my card for today and will join us with this challenge over at the DIGI CHOOSDAY BLOG!


Hasta luego ๐Ÿ‘‹ and Feliz Navidad !


Enjoy the rest of your day !


๐Ÿ’–

Card recipe:
Polkadoodles digital stamp - Bella Bear delivering Christmas gifts 
Polkadoodles Sentiment - Seasons Greetings freebie
LHC Nested Triangles dies
LHC luxury interference glitter dust - Rainbow Sparkle
Hunkydory Diamond Sparkles - Soft Snowdrift
Spectrum Noir colorista pen - lipstick
Gold peel off strips
Red and silver gems
.
.
.
๐Ÿ’–
 I am entering this card in the following challenges:


Thanks for stopping by and reading my blog I would love if you could leave me a comment. 

Wendy x

Tuesday, 12 July 2022

Winnie Sunshine Delight - Shopping Bliss ! with Polkadoodles

Hello everyone……wishing you all a lovely Tuesday with lots of sunshine.


I'm back today with another Polkadoodles Design Team project for the Digi Choosday Tuesday Challenge 

๐Ÿ’–

Every Tuesday is DIGI CHOOSDAY! over at Polkadoodles which means not only a brand new crafty 'Anything goes' challenge but also that you get an amazing discount off all crafty printable downloads until midnight today! 


To take advantage of the offer head over to the blog to find the discount offer for today and also to enter the challenge!

DON'T MISS IT!

๐Ÿ’–

For my shopping themed project today I have started by creating a basic bridge fold card that will fit inside a standard 6" x 6" envelope.  I am going to create a box envelope for this card due to the added dimension and it's for a special birthday card.  

I have taken a piece of 8" x 6" white cardstock - I like to use 300GSM Neenah Classic Crest Solar white card to make my card bases so they are a little more sturdy.

First score the card along the 8″ side at 1″ and at 7″..... flip the cardstock over and then score again along the 8″ side at 2″ & 6″ .. this will give nice mountain and valley score lines for the card and prevent the card from cracking.  I have also cut a piece of 6″ x 1.5″ card for the bridge.

I have then used papers from the Winnie Fruit Punch Paper Heaven 5 Bundle to cover my base card and the bridge panel....I chose papers to make the card look like a dressing or changing room with designer wallpaper.  I've also added a little lace border of washi tape between the two papers.


Next I've adhered the actual bridge piece onto the decorated card base, attaching one side at a time to make it easier using a strong double sided tape.


To attach the bridge to the card, fold the left side in and then glue or fasten then fold the right side flat or open and adhere the bridge panel on the right.  This will allow the card to fold flat to fit into your envelope or box.


Then the card is ready to be decorated which I think is always the fun part of making a card!


I coloured in my focal image with my Promarkers - I chose to use Sunshine Delight Shopping Bliss - Winnie Sunshine Delights for this card.  She is also available as always in a pre-coloured version.  I wanted to colour the mermaid dress in rainbow colours and used the same set of colours for Winnie too.

To decorate my little changing room I've chosen a few embellies from the Winnie Fruit Punch bundle  which have been resized to fit my card  on my computer before printing and cutting them out with my Scan'n'Cut machine.

I found a small wooden frame in my stash which I've backed with some mirri card and coloured with a brown Wink of Stella pen to create a little mirror for the dressing room.


Just look at all that shopping on her trolley and she still wants to buy even more! 

I've used a small popup card hinge to add the display of shoes inside the little room - you can just see it peeking from behind the overloaded shopping trolley. 


The 'Hmmmm' cloud was added using an acetate hinge so it floats behind Winnies head. 


And finally I decided to add one of the sentiments from the bundle to the back panel of my card.  

The butterflies are taken from the same bundle too.


๐Ÿ’–

I hope you liked my card for today and will join us with this challenge over at the DIGI CHOOSDAY BLOG!


Hasta luego ๐Ÿ‘‹ 

Enjoy the rest of your day !


Card recipe:
Polkadoodles digital stamp - Winnie Sunshine Delight - Shopping Bliss 
Polkadoodles Sentiment - Winnie Fruit punch collection bundle
Promarkers - see below
Distress Inks - Tumbled glass
Wink of Stella sparkle pen - brown gold
Sakura Gelly Roll pen - white, black
Glossy accents
.
.
.
๐Ÿ’–
.
.
.
Promarkers used:

Mermaid Dress: Powder blue, Cobalt Blue, Lime Green, Lime Zest, Yellow, Sunflower, , Pumpkin, Orange, Lipstick Red, Berry Red, Pastel Pink, Carmine

Hangar: Cool Grey 1,3

Shoes: Powder Blue, Cobalt Blue, Cool Grey 1,3

Socks: Lime Green, Lime Zest

Handbag: Cobalt Blue, Powder Blue

Flowers: Sunflower, Yellow, Pumpkin, Lipstick Red, Berry Red, Pastel Pink, Carmine 

Leaves: Bright Green, Lime Green, Lime Zest

Dress: Pumpkin, Orange, Sunflower, Yellow

Skin: Ivory, Almond, Satin, Dusky Pink, Sun kissed Pink

Blush: Pale Pink, Dusky Rose

Hair: Pastel Yellow, Buttercup, Sandstone, Caramel

 
๐Ÿ’–

I am entering this card in the following challenges:


Thanks for stopping by and reading my blog I would love if you could leave me a comment. 

Wendy x